Volume discounts are a powerful way to increase average order value by rewarding customers when they buy more. This guide walks you through creating a Volume Discount Type Offer step by step in the Legacy Volume Discounts app.
1. Create a New Offer
Go to the Offers page.
Click Add new to get started.
Choose Volume Discount
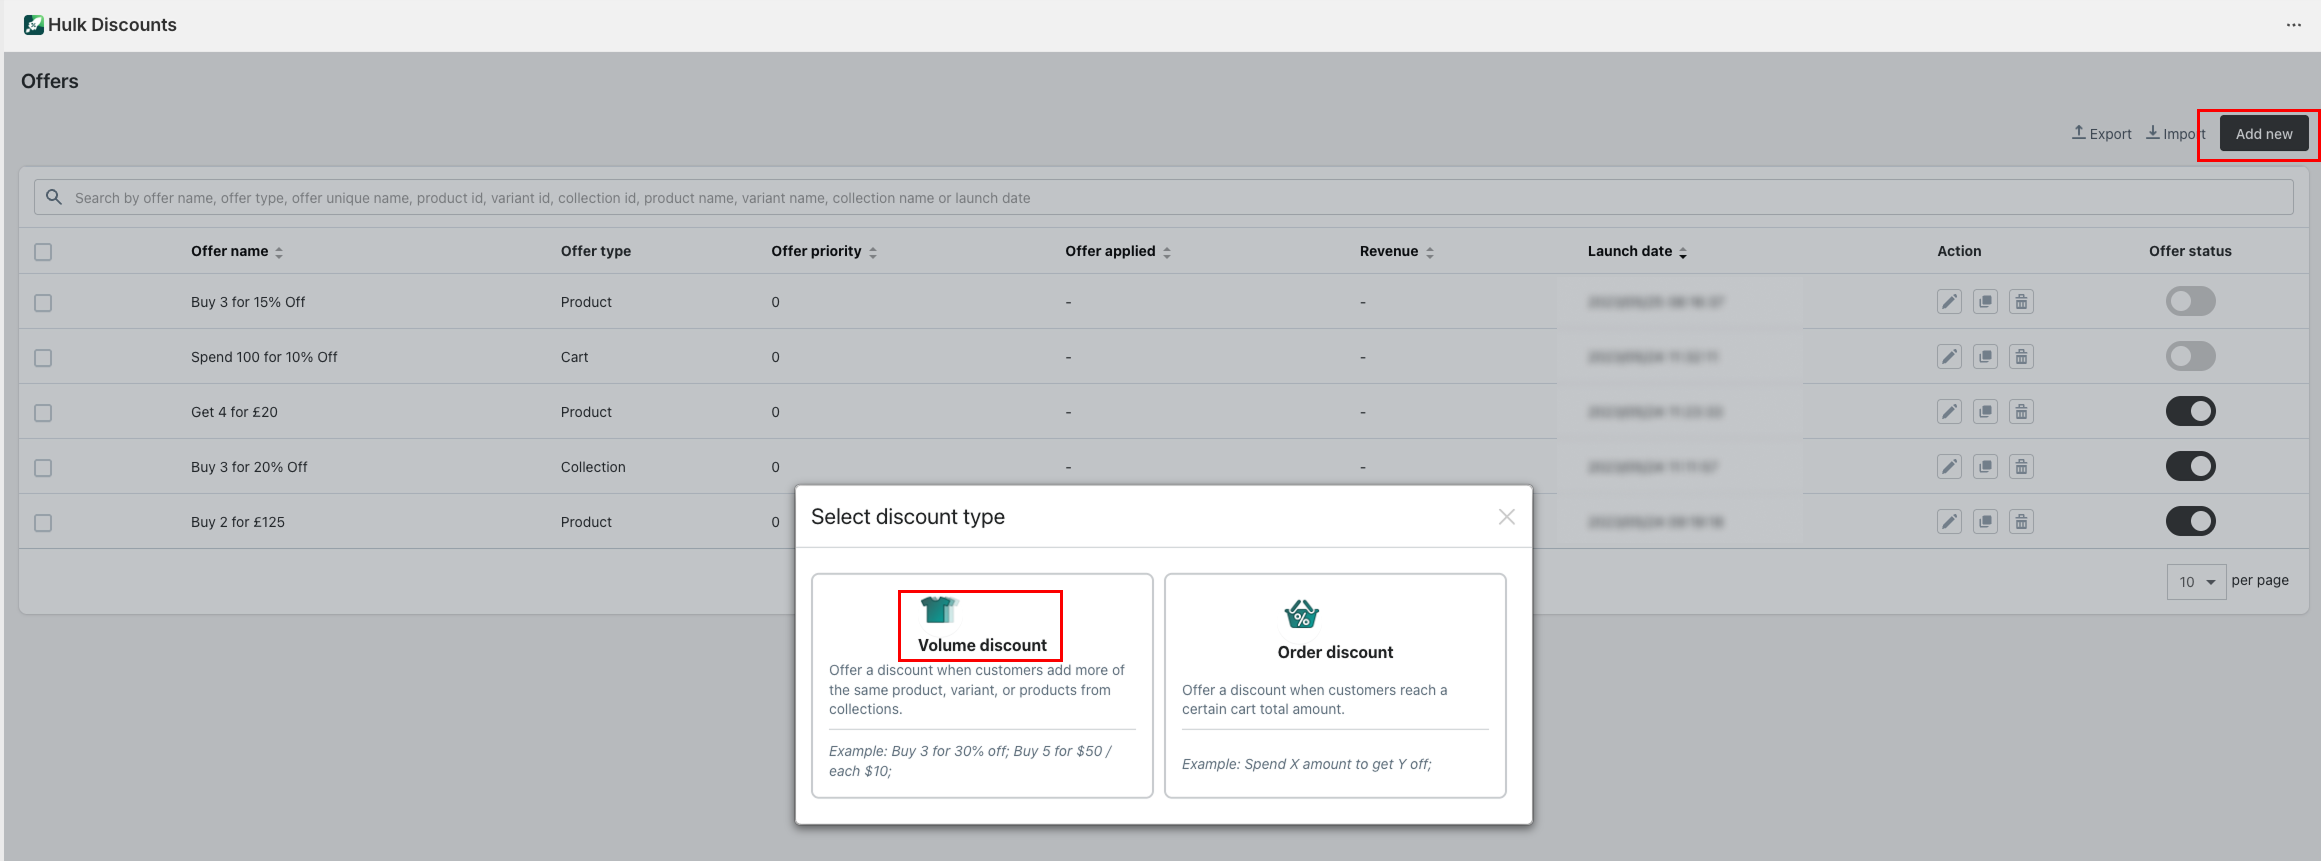
You’ll see the main offer setup screen where you can begin configuring your discount.
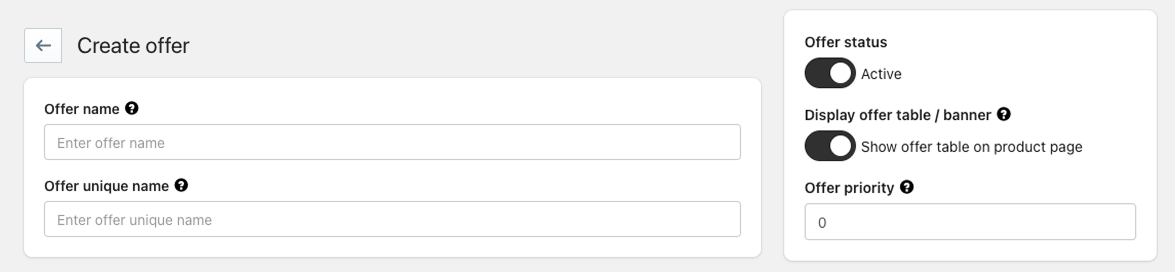
2. Enter Basic Offer Details
Start with the foundation of your offer:
Offer name – Add a descriptive name (e.g., Buy More, Save More – Summer Sale).
Offer unique name – A unique identifier for internal use (used by the system).
Offer status – Toggle the offer Active when you’re ready for customers to see it.
Display offer table/banner – Turn this on to show the offer on the product page.
Offer priority – Enter a number to prioritize this offer if multiple offers apply.
Offer title & description – Text that customers will see above the price table (e.g., Buy 2 or more and save!)
3. Choose the Discount Type
In the Select offer type section, choose how the volume discount should behave:
Available types:
Product – Discount applies when customers add more of the same product.
Variant – Discount applies to specific variants within a product.
Collection – Discount applies across selected products in a collection.
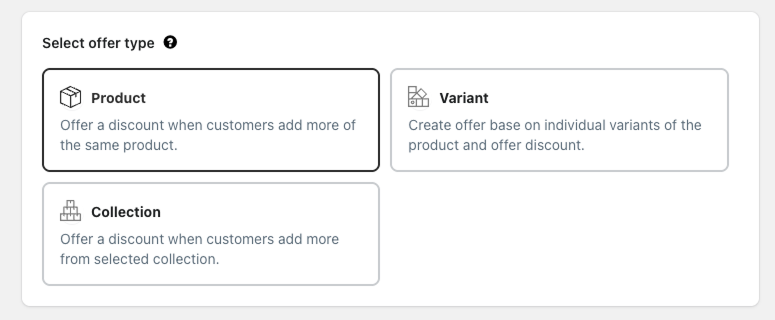
Choose the type that suits your pricing strategy.
4. Select Products or Variants
Depending on the offer type you selected:
Product – Pick the products this discount applies to.
Variant – Select specific variants.
Collection – Choose the collection of items eligible.
You can use:
Select all
Custom selection
Product tags

This gives flexibility based on how your products are organized.
5. Choose Discount Calculation Type
Decide how discounts are calculated:
Per item – Discount applies individually to each qualifying product.
Bulk items – Discount applies based on total items in cart.

Both options determine how totals and savings are computed for your customer.
6. Set Price Levels
The heart of a volume discount is price levels – the tiers that define how much customers save when purchasing more.
In the Price levels section, you define:
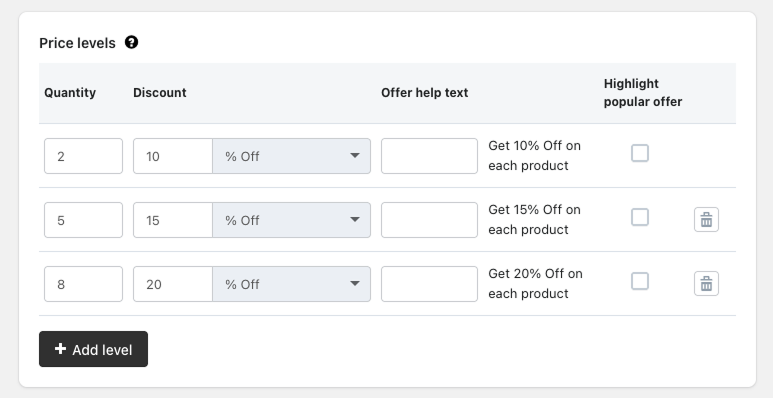
For each price level:
Enter the minimum quantity required.
Enter the discount value.
Choose the discount type (% Off, Fixed $ Off, or other available options).
Optionally enter offer help text that shows on product pages.
Use the Highlight popular offer checkbox to emphasize a specific tier.
You can add more levels using + Add level.
This feature lets you create buy more, save more pricing that motivates larger purchases.
7. Configure Additional Settings
Below the levels section are optional offer behavior settings:
Show offer using customer tags – Only show the offer to tagged customers.
Hide offer using customer tags – Exclude specific customers from seeing the offer.
Limit discount quantity – Cap how many discounts a customer can redeem.
Schedule offer – Set a start/end date & time.
Round discounted price – Round prices for cleaner display.
Country selection – Restrict by customer location.
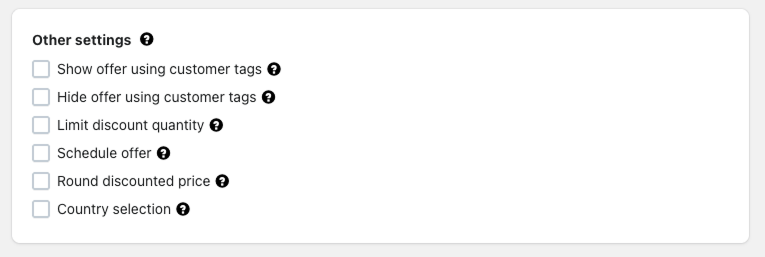
These settings give precision control over how and when your offer is presented.
8. Review & Activate
Once everything is configured:
Double-check quantities and discount values.
Preview the offer on the product page (if enabled).
Set the Offer status to Active.
Save your offer.
Now the volume discount will automatically apply when customers add qualifying quantities to their cart.
Tips For Best Performance
- Use clear offer titles and help text so customers understand savings.
- Highlight a popular tier to boost conversions.
- Test offers across collections and product variants to see where they perform best.
Was this article helpful?
That’s Great!
Thank you for your feedback
Sorry! We couldn't be helpful
Thank you for your feedback
Feedback sent
We appreciate your effort and will try to fix the article