Creating a custom form in Hulk Form Builder takes only a few simple steps. You can start building from scratch or select from a library of pre-designed templates tailored to common store requirements.
Step-by-Step Guide to Creating a Form
You can initiate form creation using either of the following methods from your app admin:
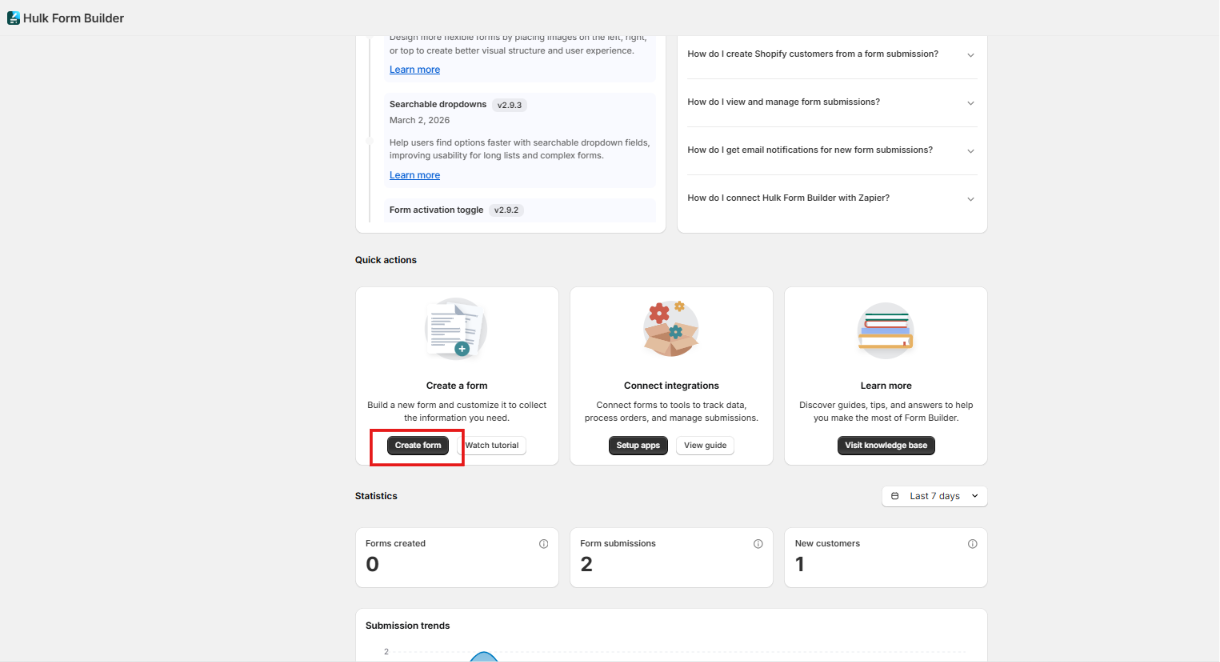
Method 1: From the Dashboard (Quick Actions)
Open Hulk Form Builder in your Shopify Admin.
Locate the Quick Action section on the main dashboard.
Click Create Form.
Select a pre-built form template or choose Start from scratch.
Method 2: From the Forms Menu
In the left navigation bar, go to the Forms section.
Click the New Form button at the top of the page.
Select your desired template or start with a blank canvas.

Customizing & Saving Your Form
- Add & Customize Fields: Add, remove, or reorder elements to build your desired layout.
- Configure Settings & Design: Explore the Elements, Settings & Apperance tabs to set up email notifications, styling, or integrations (such as Shopify Customer sync, Mailchimp, or Klaviyo).
- Live Preview: Check the Form Preview card to see your real-time adjustments reflected visually.
- Save Your Changes: Click the Save button to officially create and store your new form.
Was this article helpful?
That’s Great!
Thank you for your feedback
Sorry! We couldn't be helpful
Thank you for your feedback
Feedback sent
We appreciate your effort and will try to fix the article