Enterprise features Print

Modified on: Wed, 24 Dec, 2025 at 1:27 AM


1. PRODUCT IMAGE CUSTOMIZER:

The Product Image Customizer is a option type that allows shoppers to personalize products in real time. By uploading images, adding custom text, and previewing changes instantly on the product mockup, customers can create unique, one-of-a-kind designs before purchase. 


How it works: 

  • Upload Images: Shoppers can add photos, logos, or artwork to the product.

  • Add Text: Customers type names or messages, then adjust font, size, and color.

  • Live Preview: Changes instantly appear on the product mockup, reducing guesswork.

  • Easy Editing: Users can reposition, resize, or remove elements before saving.


Merchants will receive the customized image in the customer’s order, displayed as separate line item properties.

How to make it visible on the product page like other option types:

Once the option is created and assigned under the option set, please follow the steps below to make it visible on the product page:

  • Add Block under the Product Template: In your Shopify theme editor, go to the Product Template and add the Product Customizer block.

  • Add image class: This will enable the customizer to show directly on your product page for shoppers to interact with.


    How to get it from the product page image:

  • Save the theme settings.

    Now, check your product page to see if the option appears. If it’s still not visible, please reach out to us via Live Chat Support within the app or write to us here, and our team will be happy to assist you further.

    NOTE: 
    1. The Product Image Customizer cannot be previewed within the app during setup, unlike other option types.


    2. This option type is not compatible with the Edit Option feature on the cart page.

2. INVENTORY & SKU MANAGEMENT: 

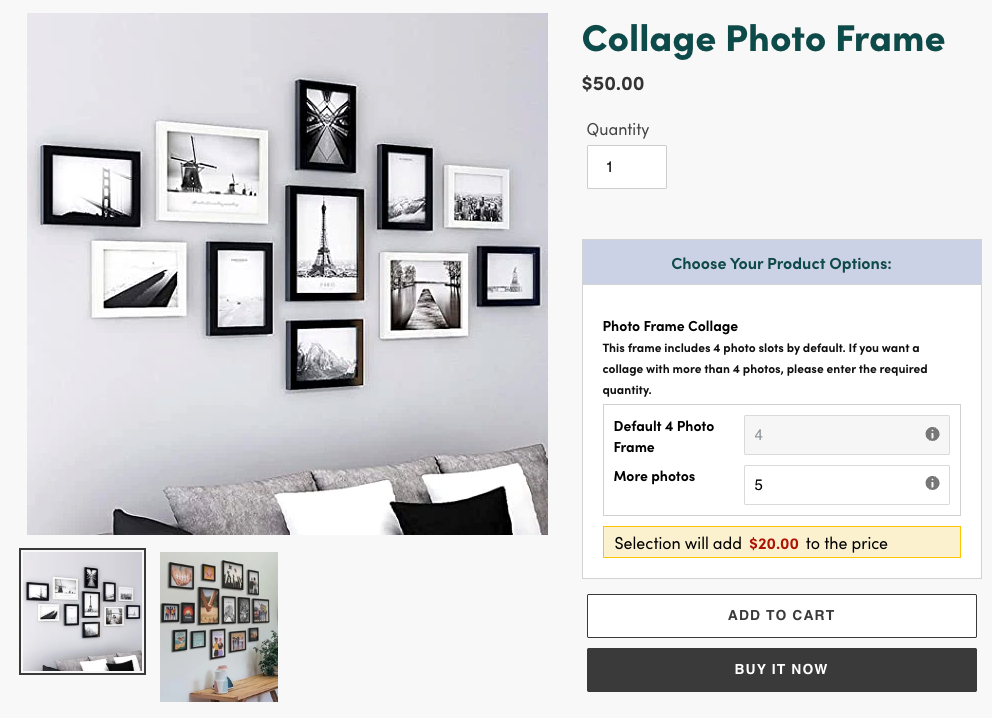
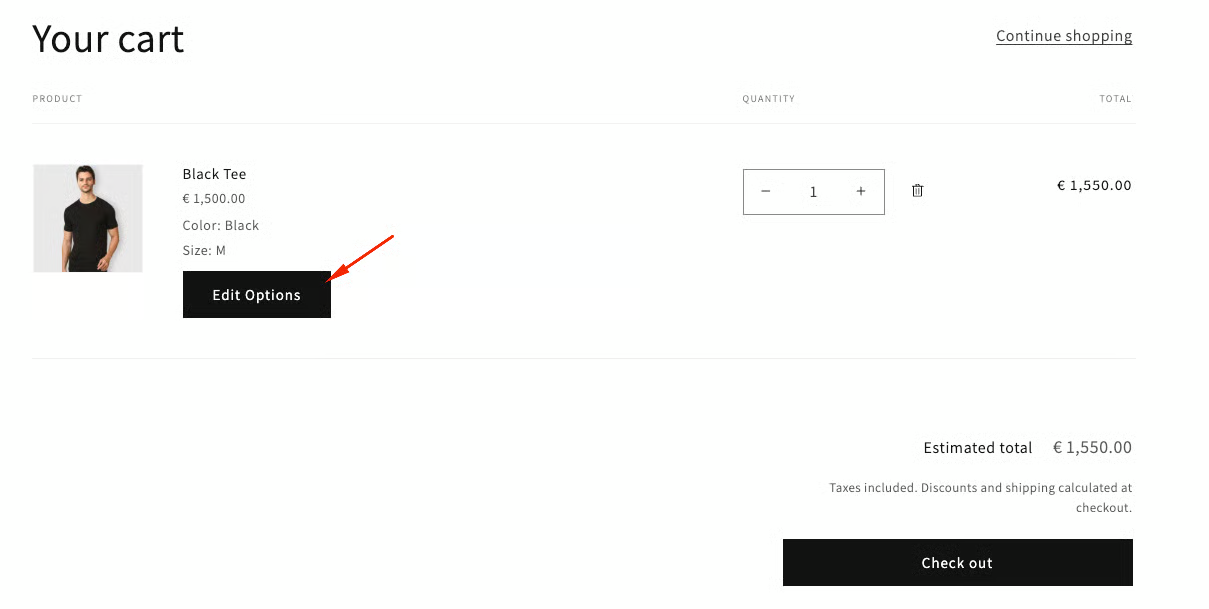
The App helps merchants keep track of product option availability and stock levels efficiently. By assigning SKUs to option values(Enterprise plan feature), you can monitor inventory for each variant separately, prevent overselling, and ensure that customers only see options that are actually in stock. This feature streamlines order fulfillment and improves overall store management.

App manages inventory for option values after an order is successfully placed, ensuring accurate stock updates. 

If Shopify’s existing variants are linked to the app’s option values, the inventory will be automatically deducted from the corresponding Shopify variant when a customer purchases that option.


For advanced control, the Enterprise plan lets you assign separate custom SKUs to each option value and set inventory thresholds, helping you track stock more precisely and avoid overselling.


Important to note:

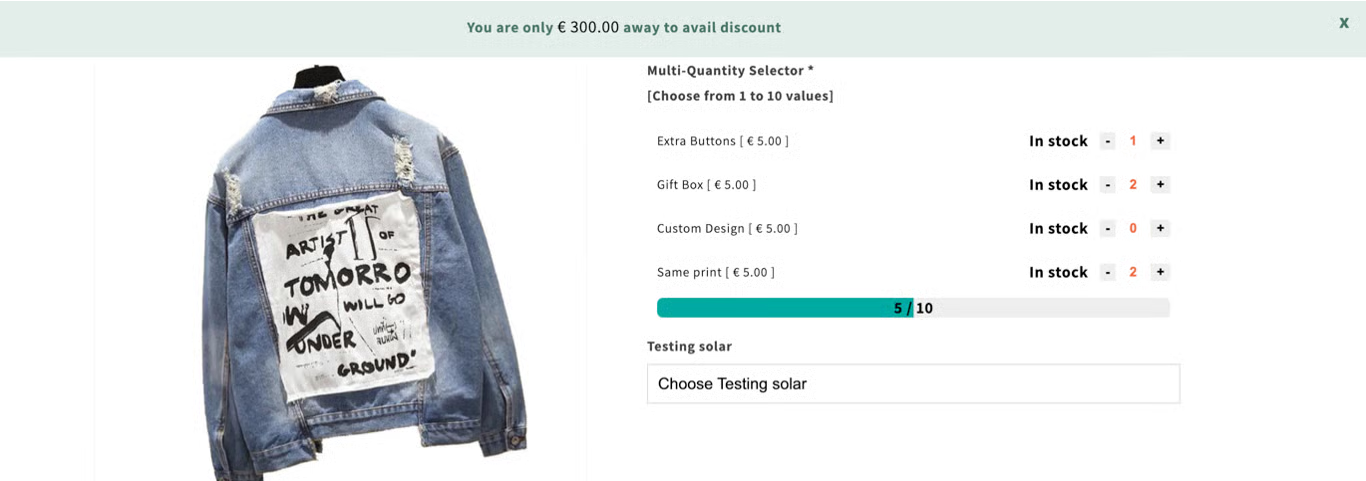
- Inventory for option values is updated only after an order is successfully completed. 

- As a result, when stock is limited, multiple customers may still place orders for the same option at the same time. 

- The final availability of an option value is confirmed only once the order has been placed.
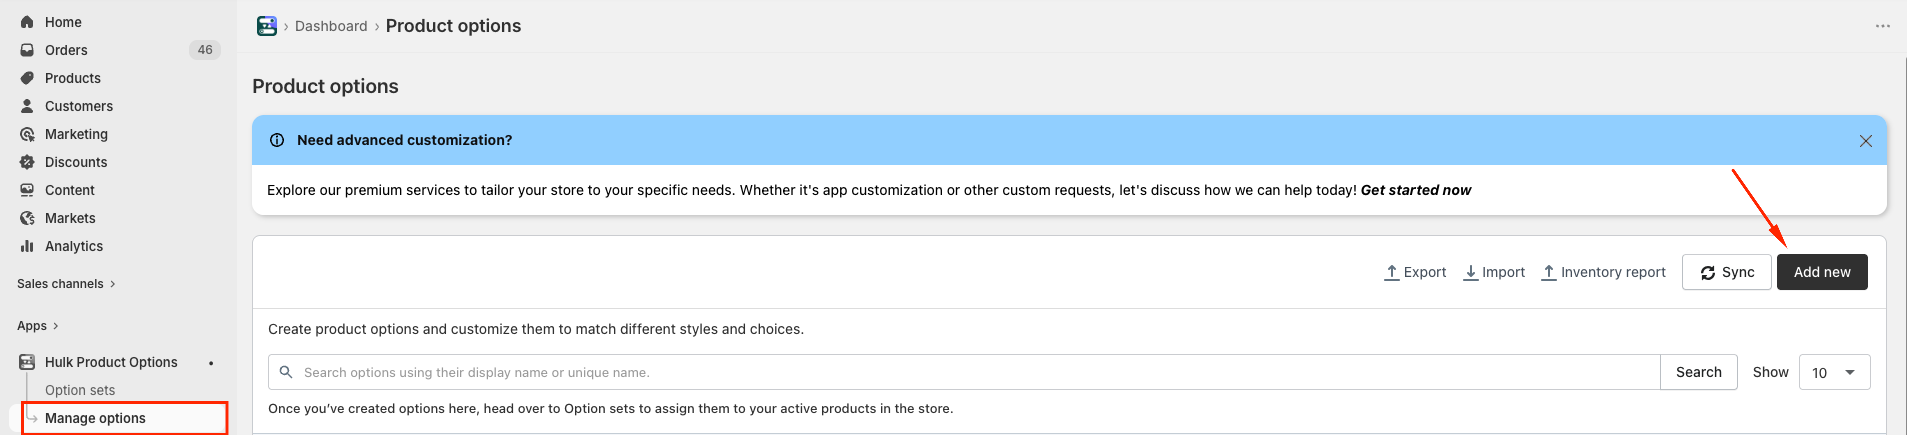
Inventory Reporting


This feature allows merchants to export the Hulk Options inventory report manually. Along with this it also allows merchants to opt-in for a weekly/monthly automated export via email. 

Please note that this feature is only available for the Options created via our app and have the Inventory Management option enabled.

To export the Inventory Report manually please navigate to the Product Options Page > Options Tab > Click on the Inventory Report. Merchant's will receive the exported data on the Store Admin email address. 


Please note that the time to process the export file will be totally dependent on the amount of data/options stored on the App Database for the particular Shopify store.

To opt-in for the Automated monthly/weekly Inventory report please navigate to the Settings Page > General Settings > Inventory reporting > Enable the option and select the time-frame of the automated export.


3. ENHANCED CONDITIONAL LOGIC:

While the Basic and Advanced plans let you show or hide entire options, Enhanced Conditional Logic lets you show or hide specific values within an option based on what the customer selects, giving more precise control over the product customization. 

For example, if you have a T-shirt color option with values Red, Blue, and Green, and a Size option with values Small, Medium, Large.


With Enhanced Conditional Logic, you could set it so that if a customer selects Red, only Small and Medium sizes are shown, and Large is hidden. This way, irrelevant combinations won’t appear to the customer.


4. GOOGLE FONT SELECTOR:

The Google Font Selector option type in allows customers to personalize text on products by choosing from a wide range of fonts from Google Fonts. Shoppers can instantly see their selected font applied, making it easy to create custom designs with the exact style they want.


Additionally, it can offer custom fonts by entering the font name and the URL of an uploaded .otf or .ttf file, giving complete flexibility to use any unique font beyond the Google Fonts library. This enhances product customization and provides a more personalized shopping experience.


5. SCHEDULE OPTIONS:

This feature helps to define a time window during which this specific option will be visible or available for selection.

  • Starting time:
    Sets the date/time when the option becomes active and visible to customers.

  • Ending time:
    Sets the date/time when the option becomes inactive or hidden from customers.

    Note: The time zone follows your store’s time format, which can be changed in Advanced Settings.


6. LINK MULTIPLE OPTIONS WITH PRODUCT IMAGE:

This feature allows the product thumbnail image (or main product image) to change dynamically when customers select certain options (swatch, dropdown, color/image dropdown, radio buttons, etc.).

  • It supports “multiple option” selections — meaning that the image can change based on the combination of several option values (e.g., Color and Size, and Pattern). 

How It Works / Setup Steps

Here are the steps and requirements to enable this functionality:

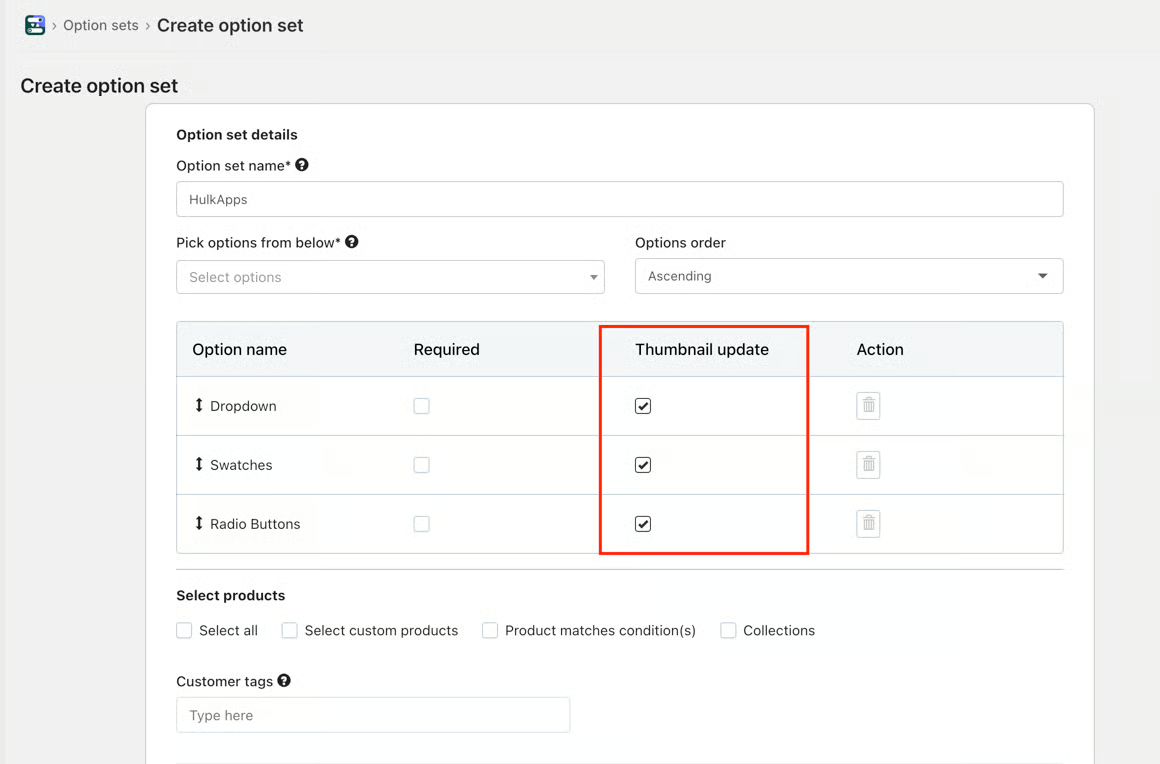
  1. Enable the “Change product image/thumbnail on option selection” checkbox for the options in which you want image change behavior. 


  2. Edit the option set and enable “Image change option combination” for all the relevant options (i.e., those options that should trigger image changes). 


  3. Target Selector Setup
    Identify the theme’s product image thumbnail class/selector from your theme’s code (Liquid/CSS). You’ll need to supply that class/selector inside the app (“Product images parent selector”) so the app knows which HTML element to target for image swapping.


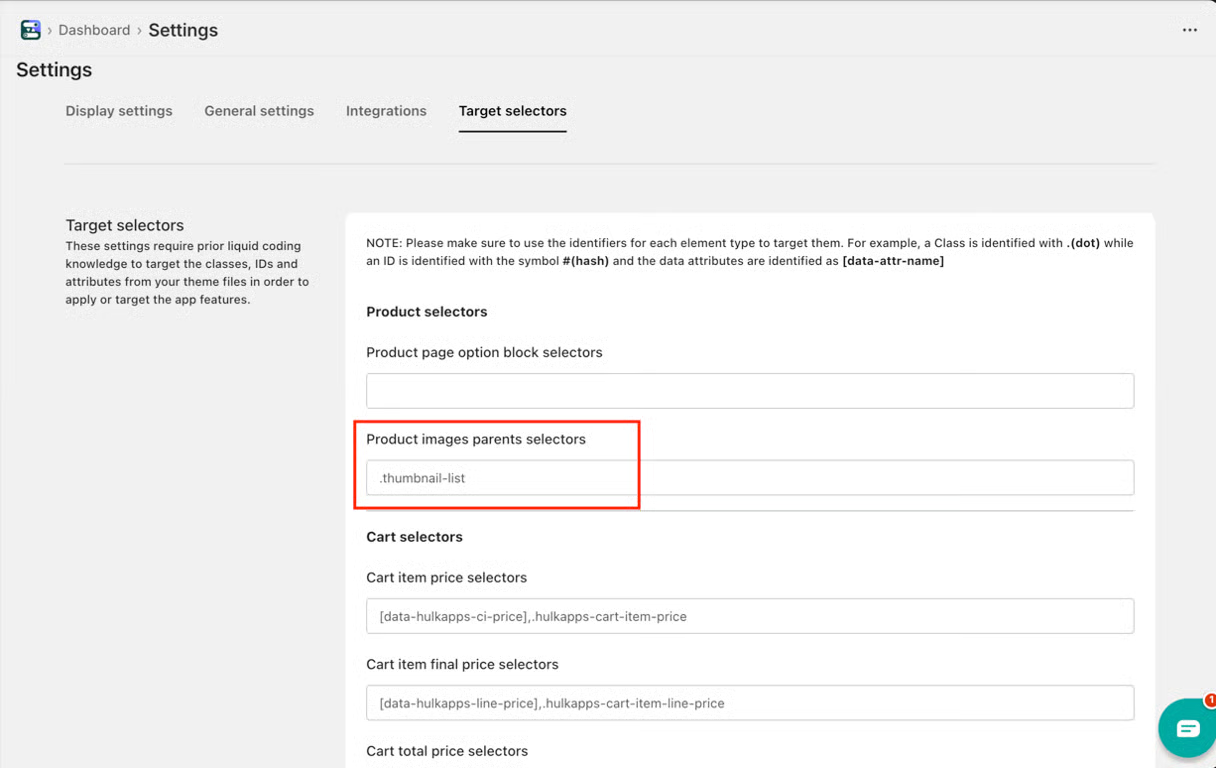
  4. Image Alt Text Matching:

    • If the image should change when one option is selected, the image’s alt text should exactly match that option name.


    • If it’s for a combination of multiple option values, then the alt text should be a string combining the option names, joined by underscores (_), in the prescribed format. For example: OptionName1_OptionName2_OptionName3. Then, when those options are selected together, the image with that alt text is shown.

NOTE: For image changes to work based on app option selection, the carousel image slider and thumbnail classes must be specified in the target selector field.


7. FORMULA BASED OPTIONS:

This option type helps define and customize product options using mathematical formulas that automatically calculate prices based on selected attributes such as color, size, or design.


It dynamically adjusts pricing and configurations according to changes in product variants, inventory, or production costs — eliminating the need for manual updates or calculations.


By automating these processes, it ensures accurate, real-time pricing and minimizes errors while providing a flexible and efficient way to manage complex product customization.

To make a formula-based option type, the following steps need to be performed:

(1) Add a new option

(2) Fill in your options: Display name, unique name, help text, and tooltip data, and choose “Formula-based options” type.

(3) Set up the formula for Addition, Subtraction, Multiplication, or Division and save it. Here is the Description of how each field can be utilized

  • Add Default value – if a value in your formula is fixed, then Add Default value is used. A default value can be any number that your customer doesn’t need to modify.
  • Add label value – if a value in your formula is variable, then Add Label Field is used.
  • (e.g. 1+___ = Answer; 5*___= Answer; 8/___=Answer)
  • Here, 1,5 and 8 in the above formulas are fixed values that can be added using Add Default value, and blank values, which need to be calculated, can be added using Add Label.
  • Label – Define the names of your value
  • Tooltip – Add a little description of your value for a better understanding of the merchant
  • Min – Max value – Restrict your customer from entering values beyond a certain range
  • Arithmetic operator – Setup your formula using arithmetic operators like + (Plus), - (minus), / (Divide), *(Multiple)

(4) 'Save' the option. 
(5) Now, add a Formula-based option to the Required 'Option sets' to make it live on your product.

Outcome:


8. MULTI-QUANTITY SELECTOR:

The Multi-Quantity Selector lets customers select quantities for individual option values on a product, not just the base product quantity.

  • For example, if you have options like “Extra Buttons,” “Gift Box,” or “Custom Design,” the customer can specify “2 Extra Buttons” + “1 Gift Box,” etc.


    How It Works / How to Set It Up
    Here are the configuration steps and requirements to enable the Multi-Quantity Selector in Hulk Product Options:

  1. Create the option and option values

    • Go to the Option tab in your Hulk Product Options dashboard.

    • Add an option type Multi-Quantity selector.

  2. Min/Max Limits (Optional)

    • You can set minimum and maximum values for each option’s quantity to limit how much a customer can choose.

    • Also possible to set total combined quantity constraints in some cases (e.g., across multiple option values) to ensure the total doesn’t exceed certain limits.

  3. Pricing Adjustments

    • Pricing adjusts based on the quantity chosen for those option values. So if “Extra Button” costs ₹5 each and quantity 2 is selected, that adds ₹10.

  4. 'Save' the option

    • The chosen quantities for custom option values are passed through with the order (in line item properties), so on the admin/order side, you can see how many of each custom option were selected.


Did you find it helpful? Yes No

Send feedback
Sorry we couldn't be helpful. Help us improve this article with your feedback.